Improve Performance with Litespeed Cache Wordpress Plugin
Posted By: Tony Baird
Last Updated: Thursday September 22, 2016
In a previous post on our blog we discussed the idea of using the LiteSpeed page caching feature to improve performance of Wordpress. The caching drastically improved the performance of a Wordpress installation. You were able to go from just over 200 requests/sec to 1800 requests/sec with just a simple htaccess line. The LiteSpeed team have however worked on making it even easier to accomplish this with the introduction of their LiteSpeed Cache plugin for Wordpress. With this plugin you have further control over your caching policies and can utilize a simplified htaccess mod_rewrite rule. I’m going to quickly go through how you install and configure the Wordpress LiteSpeed cache plugin.
The initial step of course is to install Wordpress which you can do through cPanel using Softaculous. There is no need to work with the cPanel file manager or an application like FileZilla. Just a few clicks and your Wordpress is installed. Which now leads us to the point of this post is just how to install the LiteSpeed Cache plugin.
Step 1
The LiteSpeed cache plugin requires that you’re not using the plain permalinks option. You can change this by going to Wordpress your admin interface and then ‘Settings => Permalinks’. In most cases Wordpress blogs are setup to utilize day and name but you can set them to any of the options and save the changes

Step 2
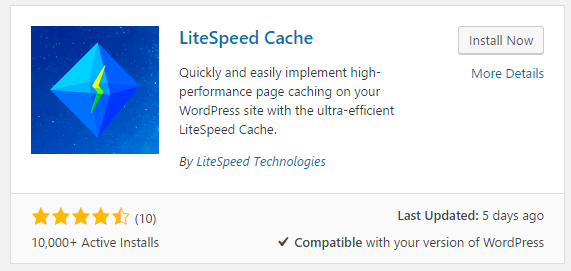
You are now ready to install the LiteSpeed cache plugin. You can do this by logging into your Wordpress admin interface then going to ‘Plugins’ and clicking ‘Add New’. On this page put in Litespeed in the search bar and you’ll see the LiteSpeed cache plugin appear

You’ll then click the install now option which will install the plugin.
Step 3
Now that it’s installed you need to activate the plugin. You can do this in your Wordpress admin interface by clicking ‘Plugins’ and then ‘Installed Plugins’. On this page you should see your list of plugins including the LiteSpeed Cache plugin. Click the activate option to activate the plugin.

Step 4
You will now see a settings option for the LiteSpeed cache plugin which you’ll click so you can start configuring the plugin. On this page you’ll be able to set the cache TTL, frontpage TTL, separate mobile caches and various other options. For most users the settings should be fine and you can just save the changes.
Step 5 (No Longer Necessary)
This setup is no longer necessary the plugin does this automatically for you.
You now need to let our web servers know you’re utilizing LiteSpeed Cache. You do this by modifying your .htaccess file and adding the following to the top:
<IfModule LiteSpeed> CacheLookup public on </IfModule>
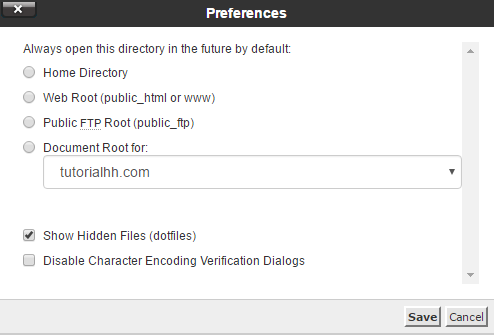
The easiest way to do this if you’re not familiar with utilizing FTP or SSH is to use the cPanel file manager. Once you’re logged into cPanel you’ll go to ‘File Manager’ then navigate to your public_html folder. You’ll notice the .htaccess file is not there this is because by default cPanel hides hidden files. You can change this by going to your file manager settings and checking off ‘Show Hidden Files’ and clicking save

You can now select your .htaccess file and select to edit it which will open the file editor for it. Then all you need to do is add the LiteSpeed cache code to the top of the file. After this your file might look something like this:
<IfModule LiteSpeed> RewriteEngine on ###LSCACHE START RESOURCE### RewriteRule wp-content/.\*/(loader|fonts)\\.php - \[E=cache-control:max-age=3600\] ###LSCACHE END RESOURCE### ###LSCACHE START FAVICON### RewriteRule favicon\\.ico$ - \[E=cache-control:max-age=86400\] ###LSCACHE END FAVICON### </IfModule>

\# BEGIN WordPress <IfModule mod\_rewrite.c> RewriteEngine On RewriteBase / RewriteRule ^index\\.php$ - \[L\] RewriteCond %{REQUEST\_FILENAME} !-f RewriteCond %{REQUEST\_FILENAME} !-d RewriteRule . /index.php \[L\] </IfModule>

\# END WordPress ```

You've now completed the installation and setup process of LiteSpeed Cache on [Hawk Host](https://www.hawkhost.com/?utm_source=blog&utm_medium=blog&utm_campaign=litespeed_cache) and it's time to take advantage of the speed increase.


