Installing Geeklog with Softaculous
Softaculous enables one-click installations of Geeklog through cPanel, which takes less than five minutes to complete.
How to Install Geeklog with Softaculous
Section titled “How to Install Geeklog with Softaculous”-
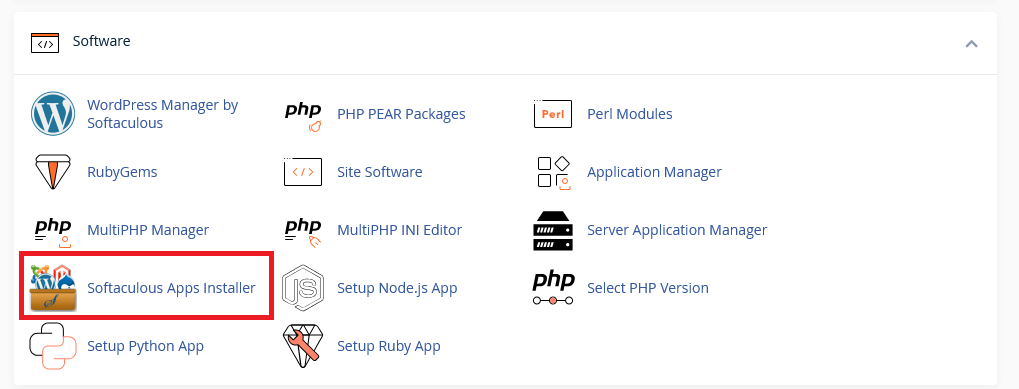
Log in to your hosting account’s cPanel and use the search bar to find “Softaculous” or navigate to the Softaculous Apps Installer under the Software section
-
Click the Softaculous Apps Installer icon that appears. You will be redirected to the Softaculous interface.
-
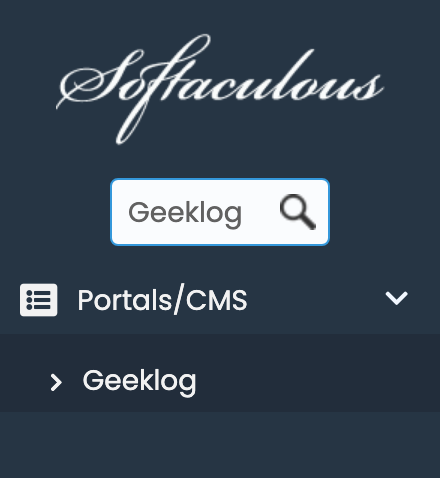
You can use the search bar to find “Geeklog”.
-
You will be presented with your installation options, including your installation URL.
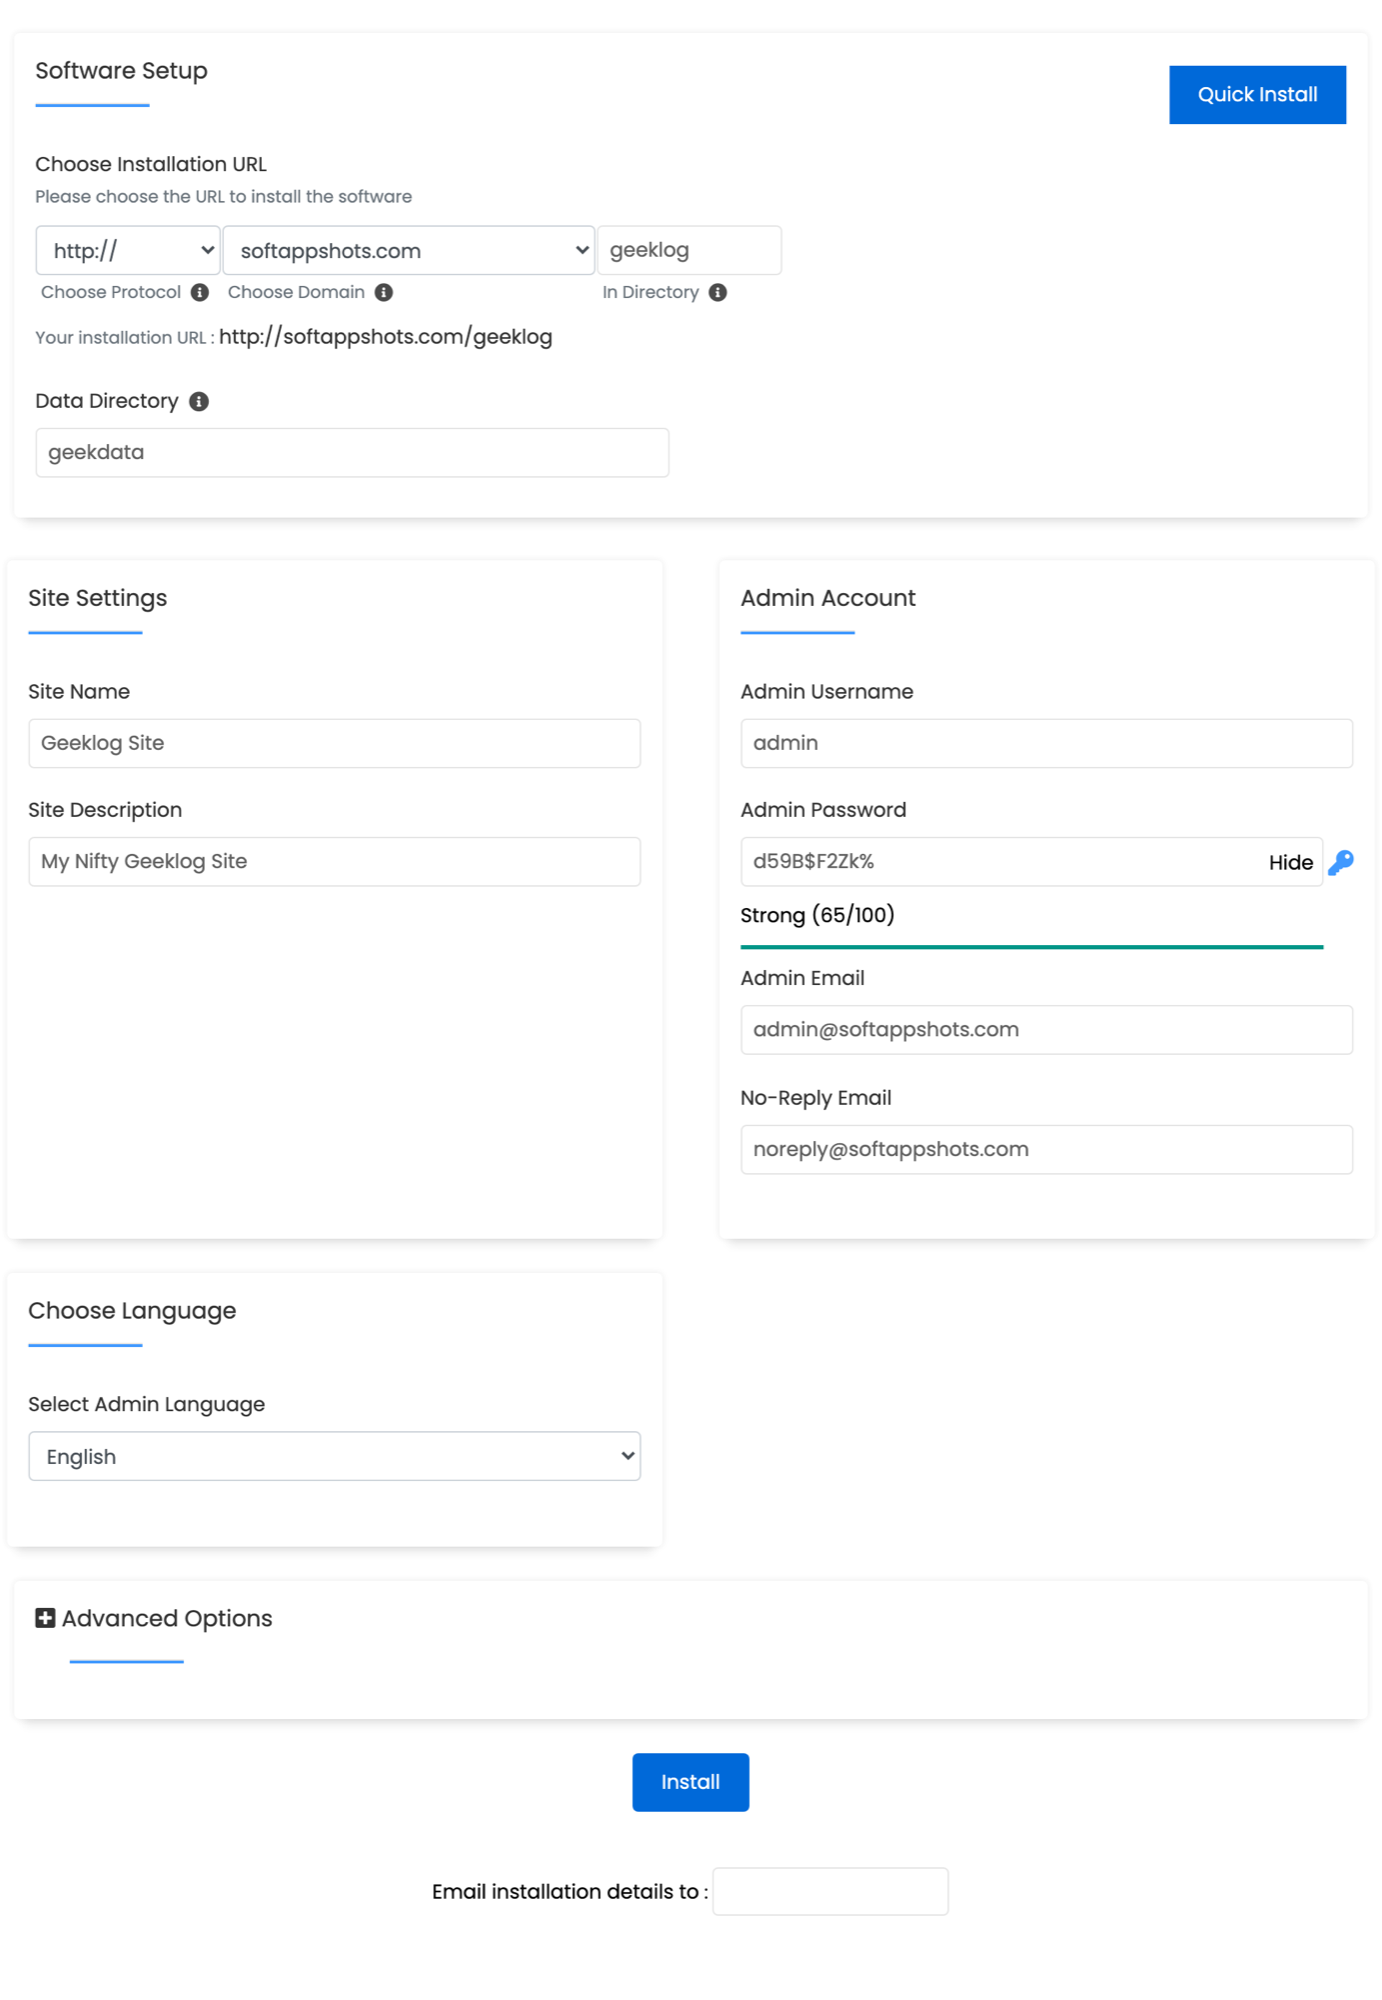
- Set Protocol to https:// for a secure environment.
- Set domain to your desired domain.
- Set Install Directory to the path where you want to install Geeklog (e.g.,
geeklog). If you wish for Geeklog to load on your main domain, leave the directory blank. - Optionally change the Data Directory path (defaults to
geekdata).
-
Scroll down and you will have the option to configure your site settings and admin account.
- Set the Site Name and Site Description for your Geeklog site.
- Set the Admin Username, Admin Password, and Admin Email. We recommend using a strong, unique password.
- Set the No-Reply Email address used for outgoing system notifications.
- Select your preferred Admin Language.
-
The installation should only take two to three minutes to complete. Once completed, you will see a page showing the message “Congratulations, the software was installed successfully”.
Geeklog Hosting Made Easy
Fast NVMe Storage • Free Migrations • 24/7 Expert Support