
How to Update and Auto-Update Plugins in WordPress
You can update WordPress directly through the WordPress admin; however, using the WordPress Management interface allows you to perform smart updates. Smart updates clone your WordPress website, update the plugin, then run a variety of tests to confirm the update will not break your live WordPress site before the system proceeds to update it.
Updating Plugins
Section titled “Updating Plugins”-
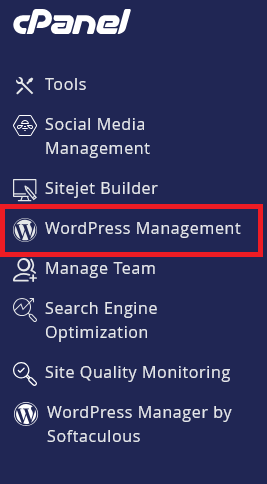
Log in to cPanel and search for WordPress Management:
-
Click on WordPress Management to open the dashboard:
-
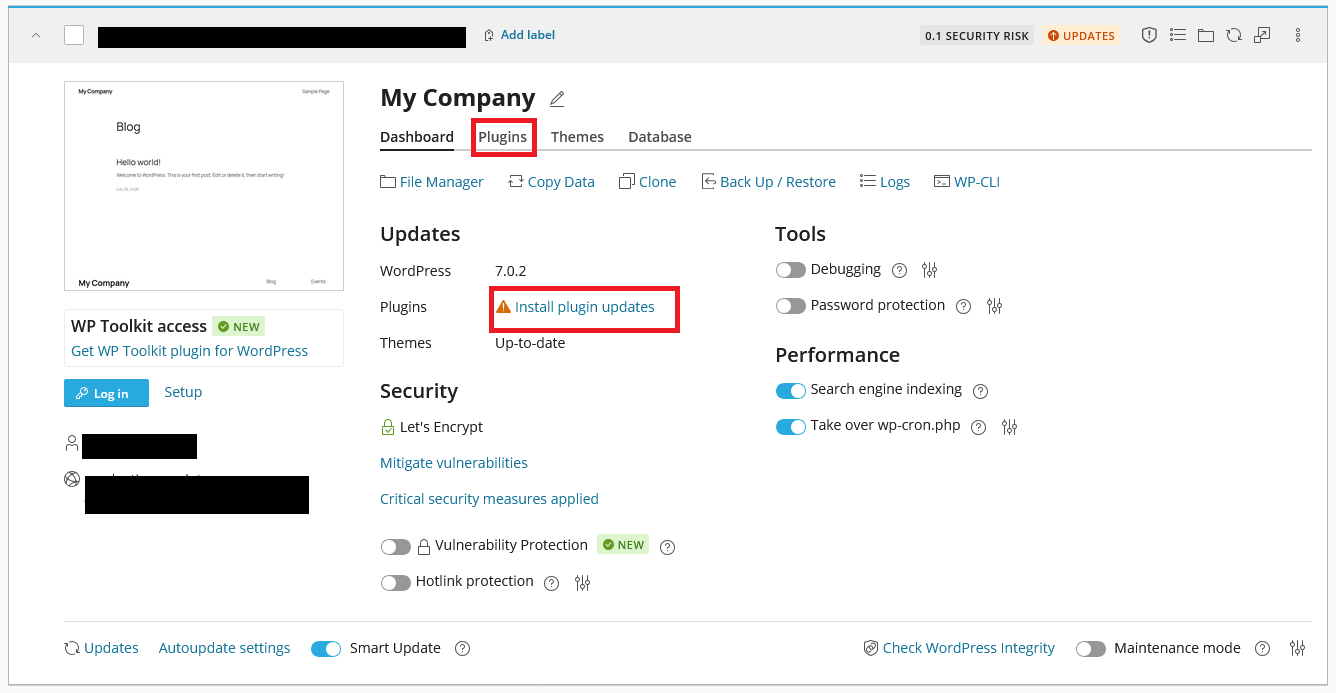
Find your WordPress site in the list you wish to update plugins for
-
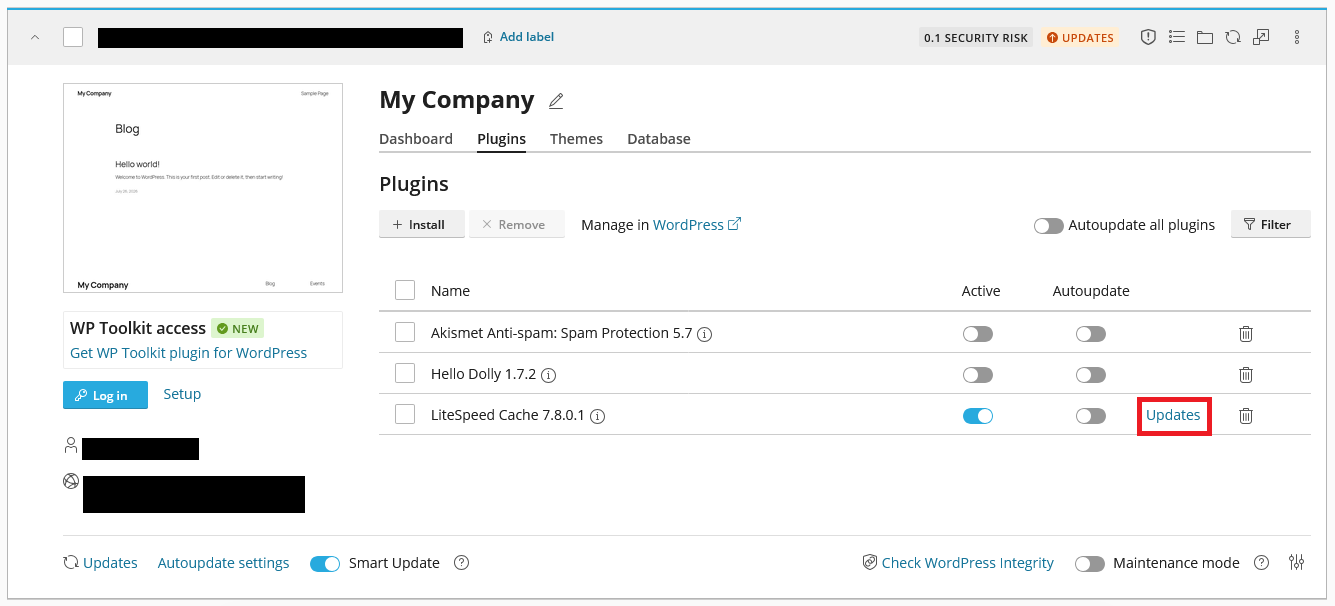
You can either click Install plugin updates or navigate to the plugins tab then click Update for the plugin you wish to update
-
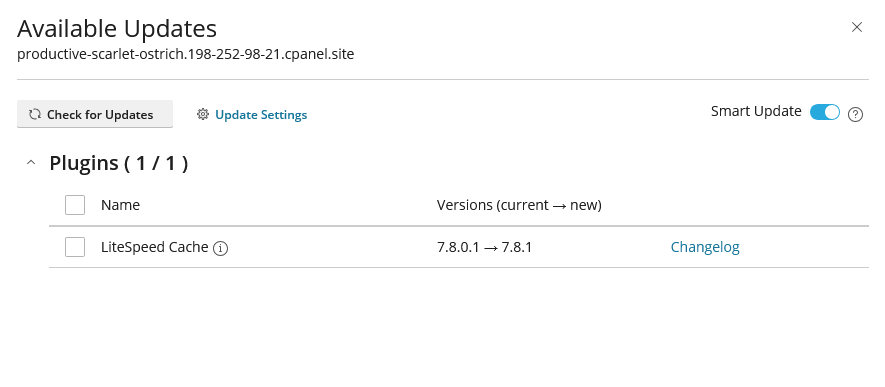
On the next page you will be presented with a summary of plugins that can be updated.
-
Review the summary and click Run Smart Update Tests button to proceed with the updates.
-
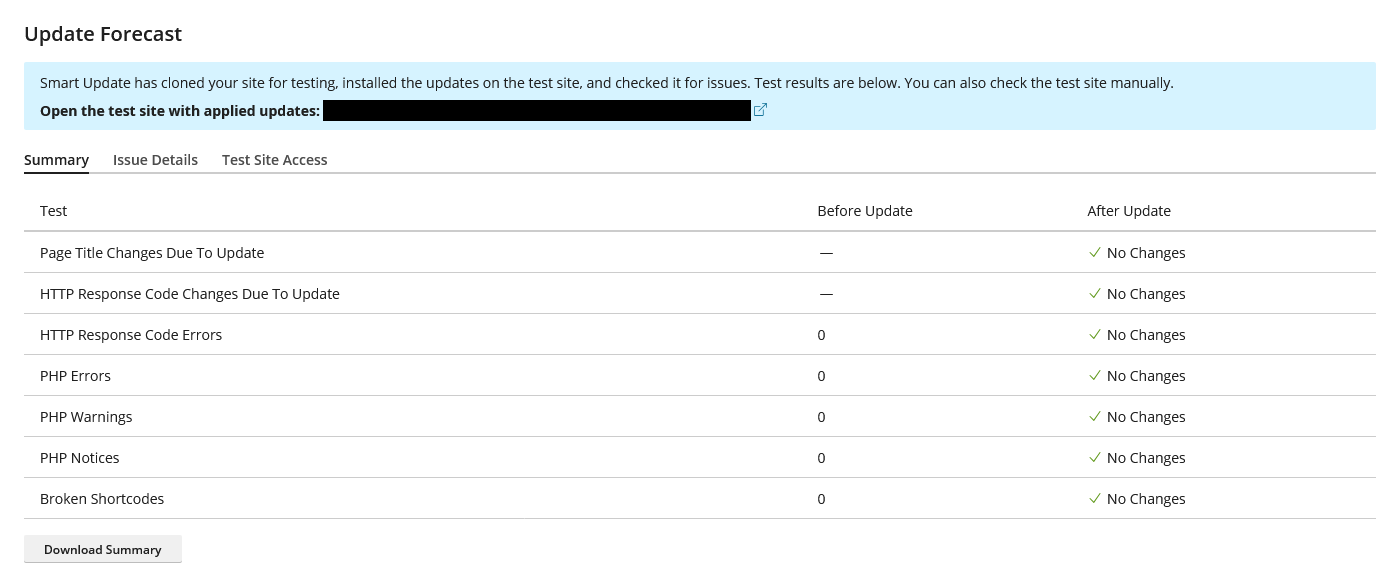
The system will now clone your WordPress website, update the plugins, and run tests to ensure the updates won’t break your site. You will be provided with a report and the ability to access the cloned WordPress website.

-
Review the report and decide whether to proceed with the updates. If you wish to proceed, click the Apply Updates button.
Auto-update Plugins
Section titled “Auto-update Plugins”You can configure plugins to automatically update when new versions are available. This helps keep your site secure and up-to-date without manual intervention.
-
Log in to cPanel and search for WordPress Management:
-
Click on WordPress Management to open the dashboard:
-
Find your WordPress site in the list you wish to configure autoupdates for
-
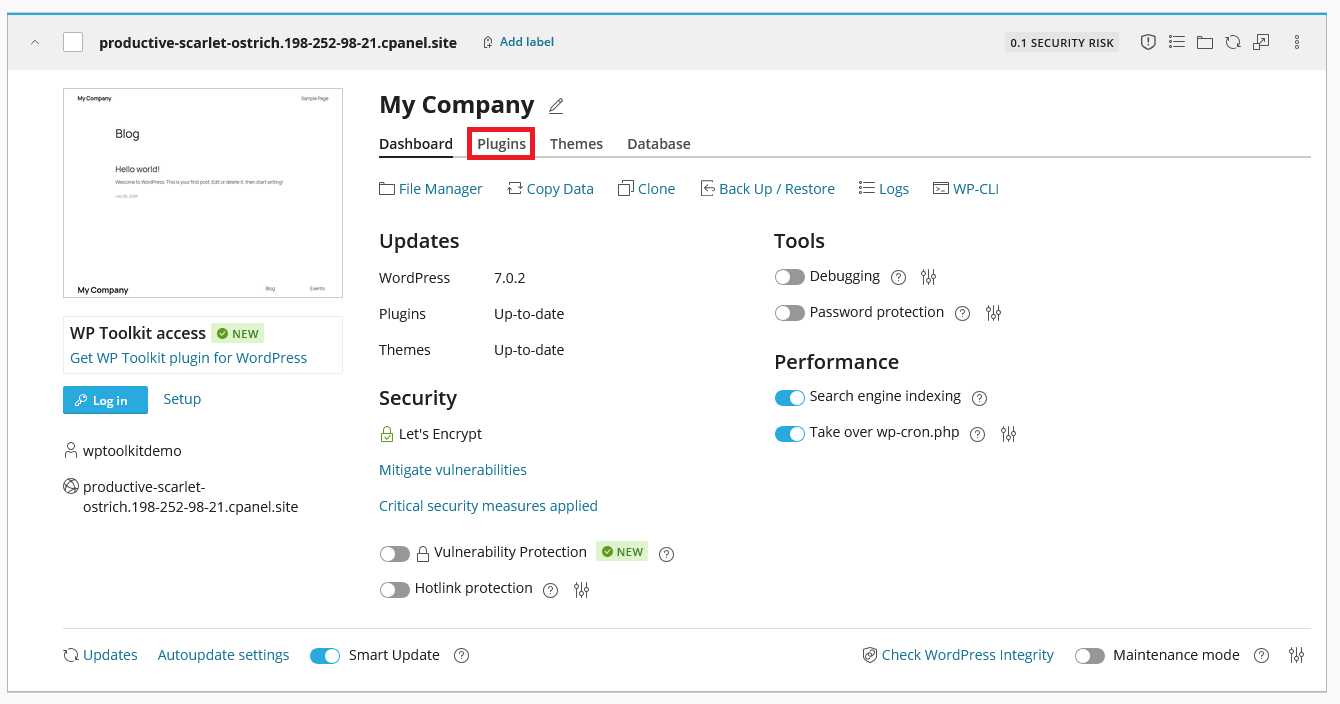
Navigate to the Plugins tab
-
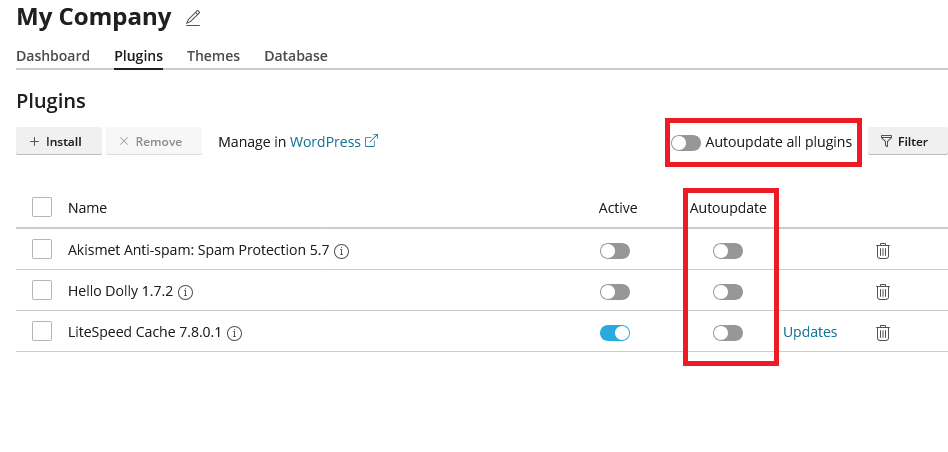
Find the plugin you want to configure for autoupdates
-
Toggle the Auto-update switch to On for the plugin or you can enable autoupdates for all plugins at once
-
Once you toggle the switch, the changes will be saved automatically
WordPress Hosting Made Easy
Fast NVMe Storage • Free Migrations • 24/7 Expert Support